
The Waterfront Reno: Best Kitchen Features for Entertaining
As promised, I am back to share more of the Waterfront Kitchen Renovation with you, and I’ll be the first to say that this kitchen was designed for a challenging client—us!
Helping clients make decisions is one thing. We can see with clarity what needs to be done, what finishes are best, and we can be objective about the plans. Making decisions for our own project was, well... interesting, to say the least.
In this case, we wanted to try different approaches that we often are not able to do with our clients, and we essentially had to practice our own process for ourselves. It took some restraint, compromise, and tough decisions, and we are thrilled with the results!
Here are the features we chose and why they are important for creating the lifestyle we have and want to lead.
Psst! In case you missed it, you can read the backstory for the Waterfront Reno here.
Features of a Kitchen Designed for A Lifestyle
1. Raised Breakfast Bar
The raised breakfast bar creates a welcoming spot for guests to sit and watch the meal prep. We can talk with Steve and keep him in the conversation, while staying out of his work area.

The raised bar also presents a visual barrier to the countertop. When you walk in through the front door, the meal prep, used pots and pans, and any other items are not easily seen.
2. Beverage Center

As I mentioned in my last post, the beverage center is located opposite the main kitchen. We placed a beverage cooler there that is stocked with water, sodas, beer, and white wines.

Above is plenty of storage for glassware and liquor bottles, so guests can easily freshen up their beverages with no fuss.

The right side of the beverage center is for the morning coffee. We have tea and other supplies located below in a roll-out shelf, and above are mugs and other supplies. When we had a crowd in for Christmas dinner, this was the perfect place to congregate in the center area, enjoy beverages and appetizers, and feel together in separate spaces. We love to sit here and watch the meal preparation. The raised section of the counter is perfect for drinks and appetizers too.
3. Functional Island

For the island, we chose a length of 12 feet to allow room for 4 adults to sit comfortably. However, since we opted for an open floor plan, we knew it would limit our wall cabinet space. There are only 2 full size upper cabinets on the cooktop wall, so creating additional storage for serving and meal prep items was important.
Thus...
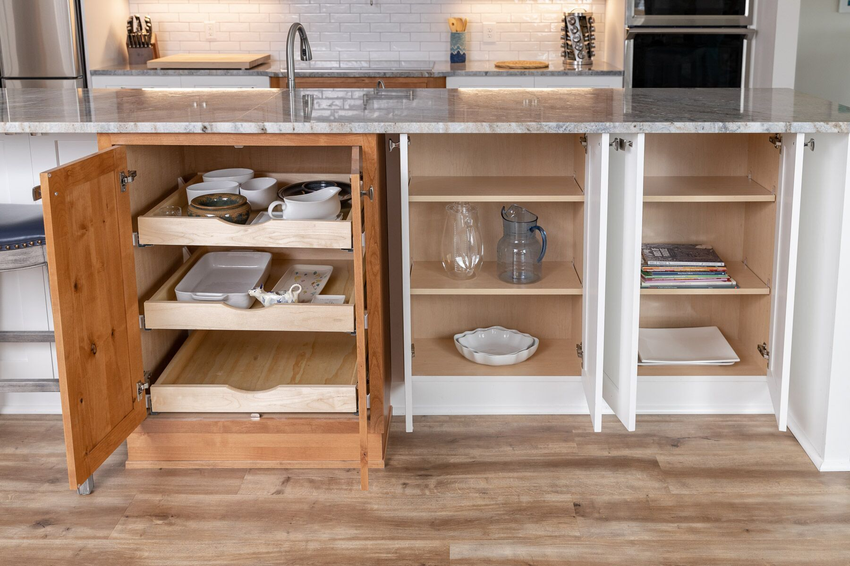
We planned for lots of storage on both sides of the island, and we made sure that the cabinets under the island were as functional as possible. The center cabinetry is deeper than the cabinets next to it, so we installed rollout drawers that we use for platters and serving pieces.
4. Roll-Out Drawers & Storage
And speaking of roll-out drawers...
In this post about the common features of older homes, I mentioned how often we see older cabinets that require you to reach all the way to the back, or fumble around to find the item you’re looking for. We decided to embrace functionality and modernity with roll-out cabinets instead.

These drawers make it simple to find exactly what you’re looking for and make better use of your storage space. Ever lose something in the very back of the cabinet? With a roll out that does not happen--you can see everything on the shelf. Waste not.

The space above the fridge is one of those areas that often get underutilized. To make the most of it, we added dividers to keep baking sheets and tins upright. These items are lightweight, easy to grab, and (in the case of a tumble), unlikely to break. This is often one of the best “ah ha” moments when we customize cabinetry for our customers.
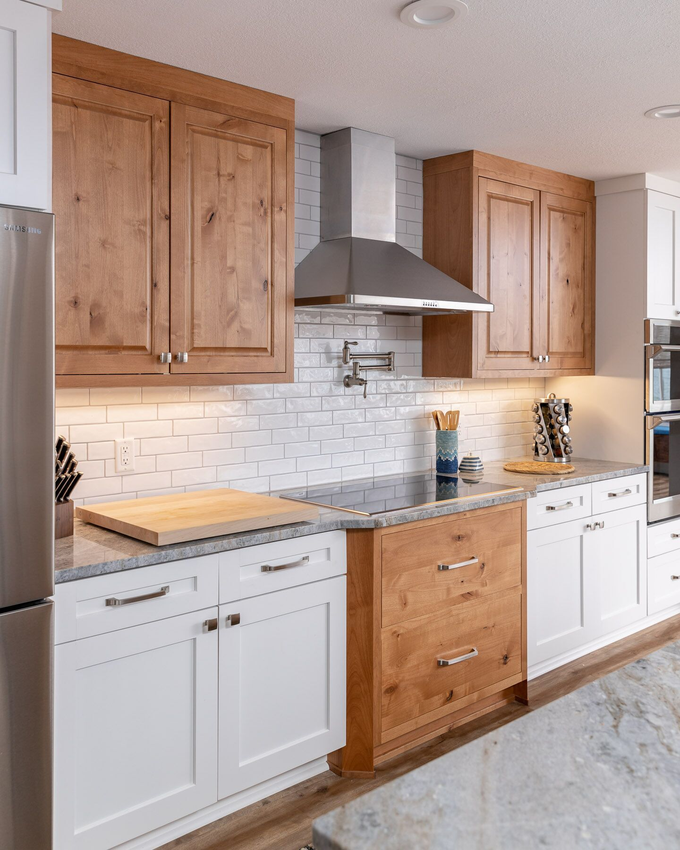
5. Range Hood and Pot Filler

Especially in an open concept space, it is extremely important to have proper ventilation over the stove. We placed a hood over the cooktop that had to be vented upward and into the attic space. It took some extra effort, but it was well worth having a space that smells clean after meal prep.

And there you have it — all the features that help us live well, entertain family and friends, connect, and enjoy each other’s company. Next Monday, I’ll be sharing the 3rd part of The Waterfront Renovation: the design and materials!
Get ready for cabinet finishes, the name of our countertop material, and an inside look at how we made the view the star of our interior.
Until then, get our 9 Essential Steps For Preparing For Your Kitchen Renovation below — it’s never too early to start planning.
See you next time,
Sarah